Version: 2.0.14
How to Install a Hosting Control Panel on Google Cloud
This guide will walk you through deploying OpenPanel on a Google Cloud VM instance with Ubuntu.
Prerequisites
- An active Google Cloud account.
- Basic familiarity with SSH, Compute Engine, and firewall settings.
Step 1: Create a VM Instance
- Log in to the Google Cloud Console.
- Navigate to Compute Engine → VM instances → Create Instance.
- Choose a boot disk image:
- Ubuntu 24.04
- Select a machine type meeting the minimum requirements:
- 1 CPU, 2 GB RAM (recommended:
e2-smallor equivalent)
- 1 CPU, 2 GB RAM (recommended:
- Add a network tag (e.g.,
OPENPANEL) for firewall rules. - In Network interfaces, assign a static external IP.
- Click Create to launch the VM.
Step 2: Configure Firewall Rules
- Navigate to VPC Network → Firewall rules → Create Firewall Rule.
- Configure the rule:
- Targets: Specified target tags →
OPENPANEL - Source IP ranges:
0.0.0.0/0 - Protocols and ports:
tcp:2087(admin panel port)
- Targets: Specified target tags →
- Save the firewall rule.
OpenPanel manages its own internal firewall; the above rule allows external access to the admin panel.
Step 3: Connect to Your VM
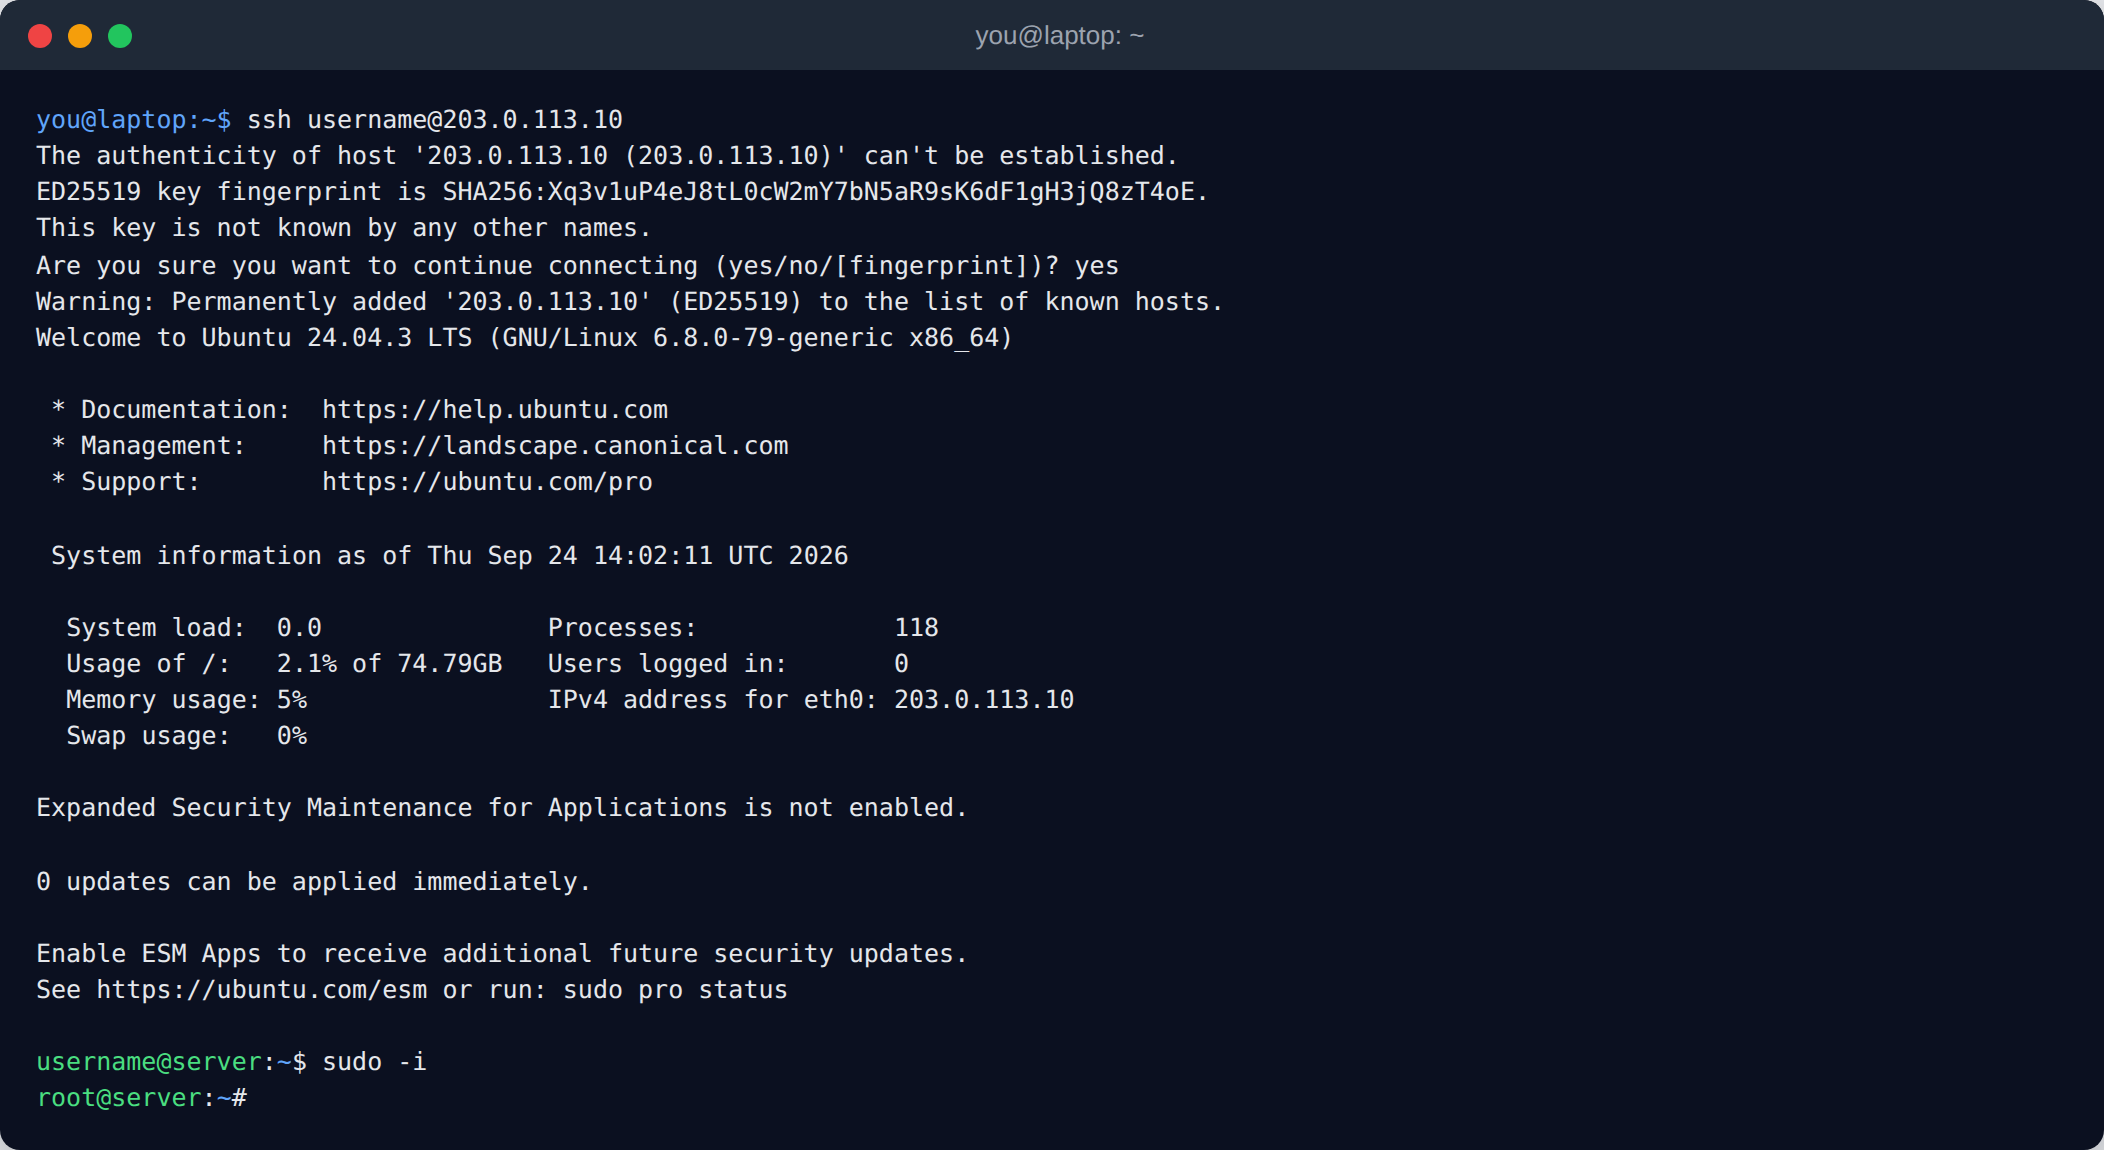
Use SSH to connect:
ssh username@yourStaticIpAddress
Replace
usernamewith your VM username (e.g.,ubuntuordebian) andyourStaticIpAddresswith your static external IP.
The installer must run as root, so switch to the root user:
sudo -i
Step 4: Run the OpenPanel Installer
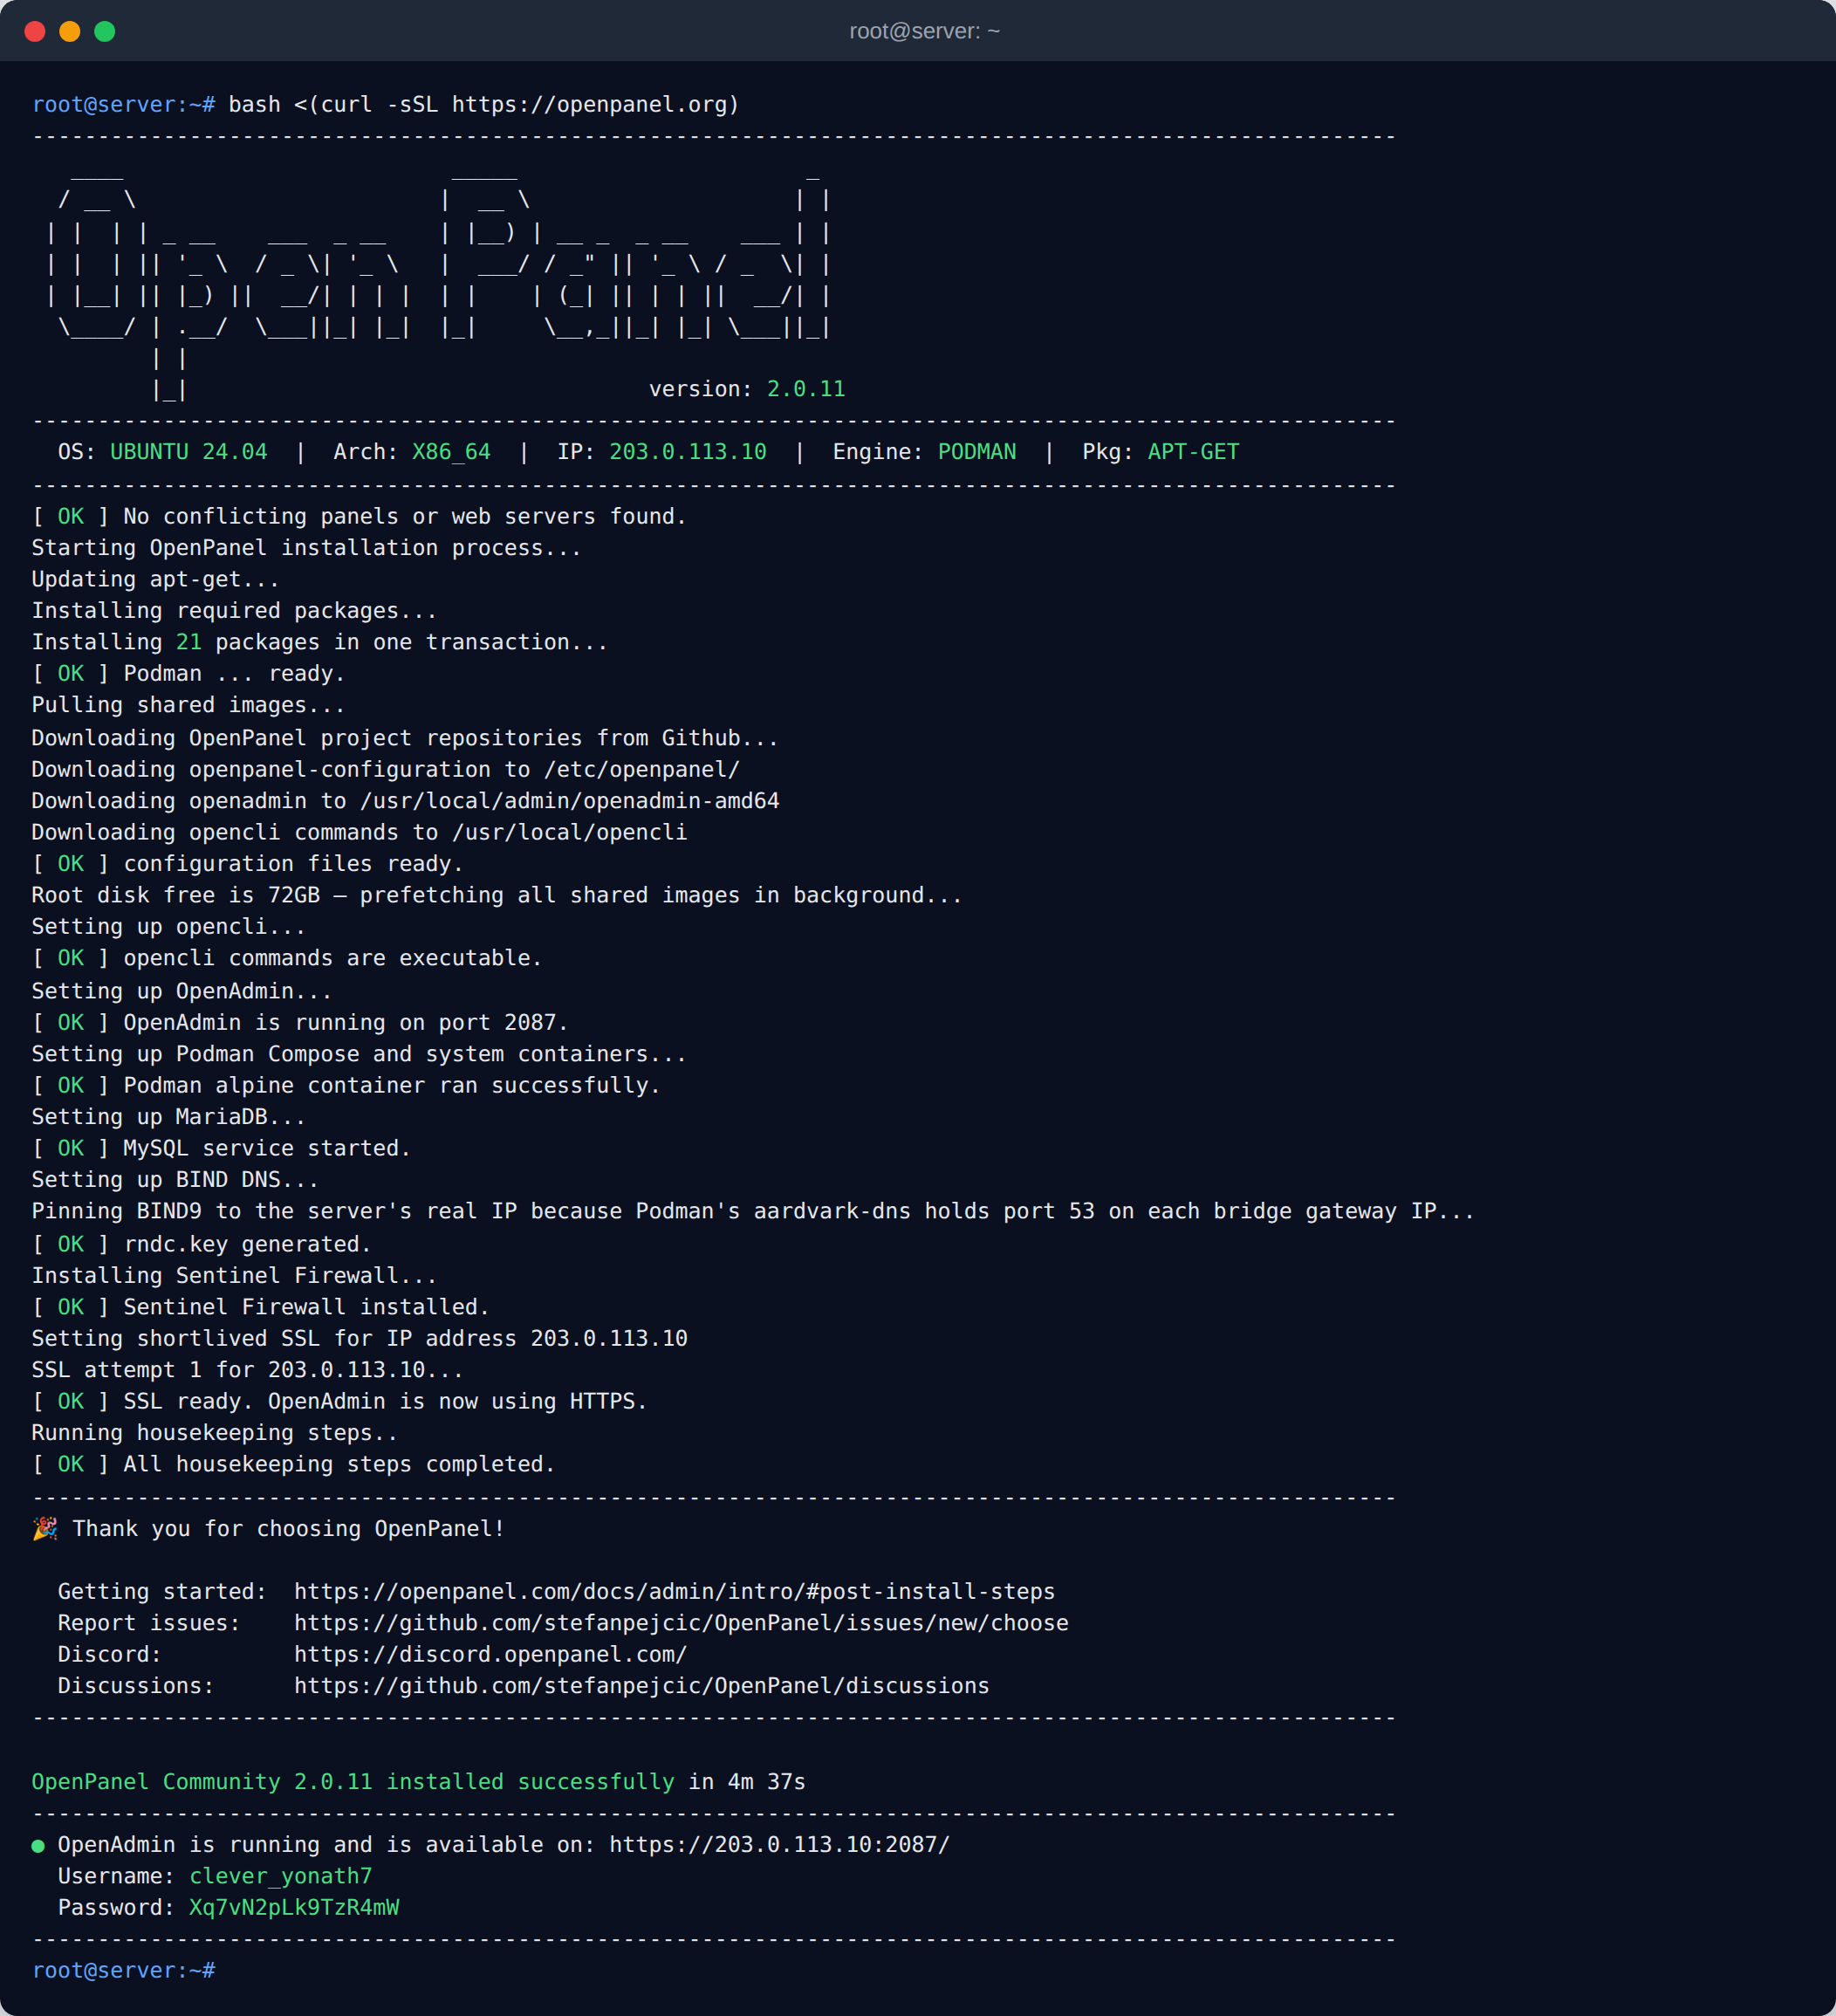
Once connected, run the installer script:
bash <(curl -sSL https://openpanel.org)
The installer runs without any prompts and takes about 5 minutes. When it finishes, it prints the OpenAdmin URL, username and password.
Step 5: Access OpenPanel
- Open your browser and navigate to:
https://yourStaticIpAddress:2087
- Log in using the credentials created during installation.
Notes
- Ensure your VM meets OpenPanel minimum requirements.
- After installation, consider restricting firewall access for better security.
- Use the OpenPanel Install Command Generator for advanced configuration options.
Congratulations! You have successfully installed OpenPanel on Google Cloud.