How to Deploy a Laravel App (Composer, Scheduler and Queue Workers)
This guide shows how to host a Laravel application on OpenPanel - from a fresh install or an existing project - including Composer, the public/ document root, artisan commands, the task scheduler and queue workers.
Laravel runs like any PHP site: the domain's web server and PHP-FPM container serve it directly, so there's no separate app container to manage.
Step 1: Add the Domain and Choose a PHP Version
- Add the domain in OpenPanel → Domains (see Add a new domain).
- Set a PHP version supported by your Laravel release (e.g. PHP 8.3 for Laravel 11/12) in OpenPanel → PHP → Select PHP Version - see changing the PHP version per domain.
Step 2: Install Laravel
Option A: New Laravel project
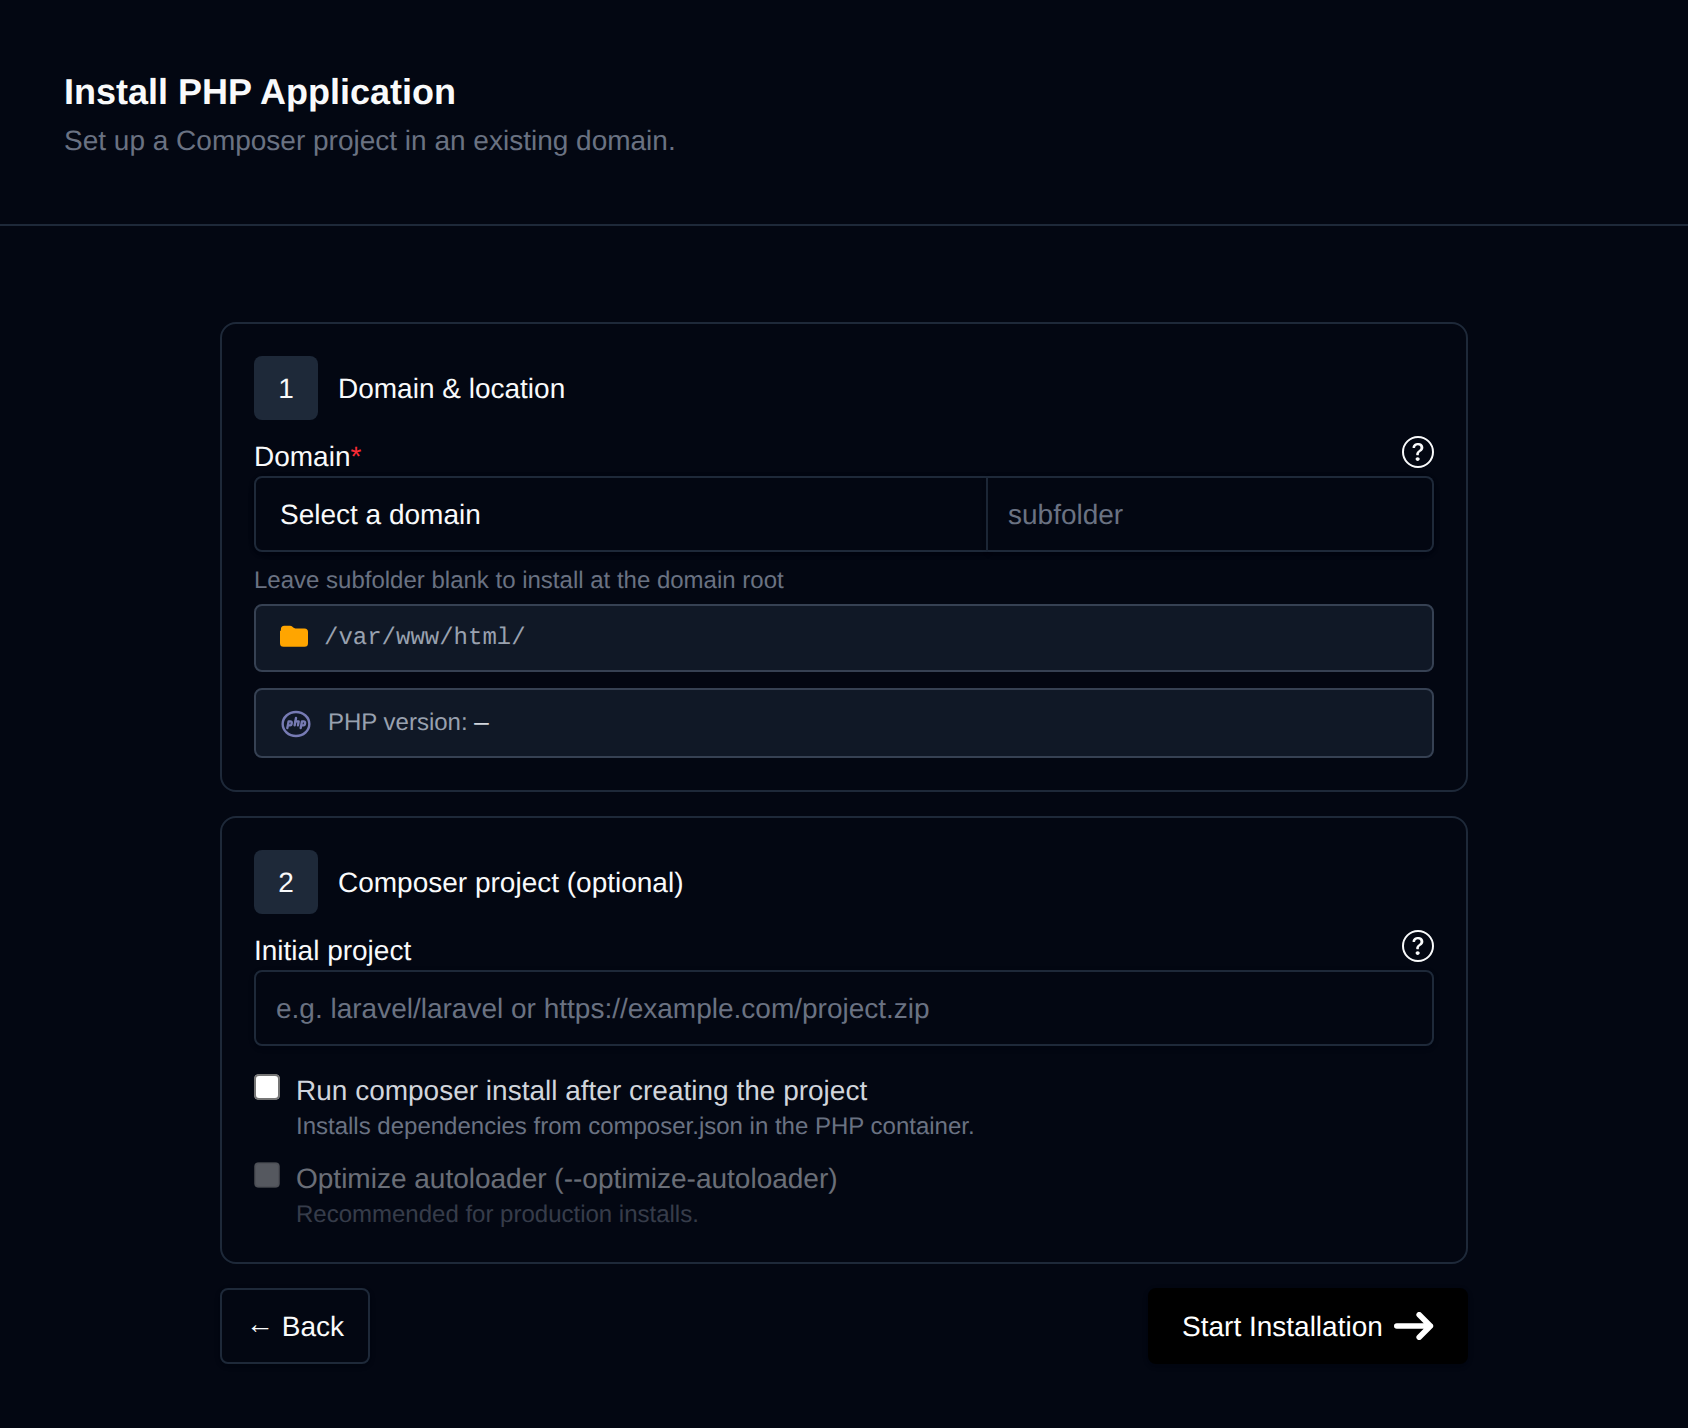
- Go to OpenPanel → Websites → Install App → Install PHP Application.
- Select the domain and leave the subfolder empty.
- In Initial project, enter
laravel/laravel. - Enable Run composer install and Optimize autoloader.
- Click install. OpenPanel runs
composer create-project laravel/laravelinside the domain's PHP container.

Option B: Existing project
- Upload your project to the domain folder (
/var/www/html/example.com/) with the File Manager or FTP. You don't need to uploadvendor/ornode_modules/. - Go to Install App → Install PHP Application, select the domain, leave Initial project empty and enable Run composer install.
You can re-run composer install or composer update any time from the app's Composer tab - see PHP applications.
Build your frontend (npm run build) locally or in CI and upload the generated public/build/ folder - you don't need Node.js on the server to run a Laravel app.
Step 3: Point the Document Root to public/
Laravel must be served from its public/ folder, never from the project root (that would expose .env).
Go to OpenPanel → Domains, click the domain, and change the document root to:
/var/www/html/example.com/public
See Change document root. Laravel's public/.htaccess works as-is on Apache and OpenLiteSpeed; on Nginx and OpenResty, OpenPanel's default vhost already routes requests through index.php.
Step 4: Create the Database and Configure .env
Create a database and user in OpenPanel → MySQL → Database Wizard. Then edit .env in the project folder:
APP_NAME=MyApp
APP_ENV=production
APP_DEBUG=false
APP_URL=https://example.com

DB_CONNECTION=mysql
DB_HOST=localhost      # unix socket, on older accounts use "mysql" or "mariadb"
DB_PORT=3306
DB_DATABASE=user_myapp
DB_USERNAME=user_myapp
DB_PASSWORD=strong-password

# optional, if the Redis service is enabled
REDIS_HOST=redis
REDIS_PORT=6379
CACHE_STORE=redis
QUEUE_CONNECTION=redis
SESSION_DRIVER=redis
DB_HOST=localhost connects through the MySQL/MariaDB Unix socket shared with the PHP container. Never use 127.0.0.1, and never use localhost for REDIS_HOST - Redis runs in its own container and is reached by its service name. See connecting to MySQL from applications.
For PostgreSQL use DB_CONNECTION=pgsql, DB_HOST=postgres, DB_PORT=5432.
Step 5: Run Artisan Commands
Open OpenPanel → Containers → Terminal, select the domain's PHP container (e.g. php-fpm-8.3) and run:
cd /var/www/html/example.com
php artisan key:generate      # only if APP_KEY is empty
php artisan migrate --force
php artisan storage:link
php artisan config:cache
php artisan route:cache
php artisan view:cache
Run php artisan config:cache again every time you change .env.
The web terminal is an Enterprise feature and must be enabled for your plan - see Terminal. If you don't have it, you can run one-off commands with a cron job and the Run button (next step).
File permissions
If you see The stream or file "storage/logs/laravel.log" could not be opened, fix ownership with Fix Permissions.
Step 6: Scheduler (schedule:run)
Laravel's scheduler needs a cron job that runs every minute. Go to OpenPanel → Cron Jobs → Create New:
- Container: the domain's PHP container, e.g.
php-fpm-8.3 - Schedule: Every Minute
- Command:
php /var/www/html/example.com/artisan schedule:run
Use the Run button to test it. See Cron Jobs.
Step 7: Queue Workers
There's no Supervisor in the PHP container, so run the queue worker from a cron job that starts every minute and exits before the next run:
- Container:
php-fpm-8.3 - Schedule: Every Minute
- Command:
php /var/www/html/example.com/artisan queue:work --stop-when-empty --max-time=55
--max-time=55 makes sure a worker never overlaps with the next one. For light queues, --stop-when-empty alone is enough.
After deploying new code, restart workers with php artisan queue:restart so they load the new version.
Deploying Updates
- Upload the changed files (or pull from Git in the terminal).
- Run Composer install from the app's Composer tab.
- In the terminal:
php artisan migrate --force && php artisan optimize && php artisan queue:restart.
Troubleshooting
| Problem | Fix |
|---|---|
| 500 error with a blank page | Temporarily set APP_DEBUG=true, or check storage/logs/laravel.log. |
404 on every route except / | The document root isn't public/, or .htaccess is missing on Apache. |
SQLSTATE[HY000] [2002] Connection refused or No such file or directory | DB_HOST must be localhost (or mysql / mariadb on older accounts), not 127.0.0.1. Run php artisan config:clear. |
Class "..." not found | Run Composer install and php artisan optimize:clear. |
Missing PHP extension (e.g. intl, gd) | See How to install a PHP extension. |
Mixed content / http:// links behind HTTPS | Set APP_URL=https://... and trust proxies ($middleware->trustProxies(at: '*') in bootstrap/app.php). |
Related
- Step 1: Add the Domain and Choose a PHP Version
- Step 2: Install Laravel
- Option A: New Laravel project
- Option B: Existing project
- Step 3: Point the Document Root to
public/ - Step 4: Create the Database and Configure
.env - Step 5: Run Artisan Commands
- File permissions
- Step 6: Scheduler (
schedule:run) - Step 7: Queue Workers
- Deploying Updates
- Troubleshooting
- Related